Polishing Stamped Jewelry

by Kristi Clark
(Houston,Texas)

Hi,
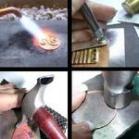
I bought a 3lb.HF tumbler some time ago to smooth the back of my disks after I punch them with hole punch. I also got the tumbler to take the excess silver black solution I oxidize with off the stamped pieces so I dont have to spend hours polishing the fronts and backs with pro polishing pads to make my sterling silver shiny. I read about it online and followed the instructions sometime leaving them in the tumbler for many hours or overnight. I also watched my water to silver ratio and used the same amount to dish soap you recommended above. I also used stainless steel shot in mixed sizes too. But it didnt work so i ended taking it back.

So for last two years I have been doing it by hand and Im tired because it waste alot of time....and polish pads are expensive. Well,Im starting soldering now and am making rings and having a hard time polishing the underside in the grooves where the solder is and im tired of scrubbing the top of the disks to get the silver black solution off......not to mention Im making larger quantities and these polishing pads get expensive and it eats up hours in my day. I need your advice. My friend said I should be using some grit sand or something. Could you please help me?

Sincerely, Kristi Clark


Stacy's Answer:

Hi Kristi!

You've got several issues going on here. First off, if your disc cutter is working properly, your discs should need very little finishing work as the edges should be clean. Extremely rough edges of a newly cut disc is an indication that your punch is in need of replacing.

Many moons ago, we had to cut our own discs, but nowadays, one can purchase discs in most metals and in many sizes and gauges that are pretty much ready-to-use. I'm sure you'll agree that having to spend hours sanding discs is a waste of time. You could leave rough discs in a rotary tumbler for weeks and they would still need some additional finishing work. No thanks!

As to the rings and finishing off the excess solder....make sure your join is clean by using clean flush-cut jumprings. Be sure to snug them so that you have a seamless cut. More is not better with solder, so try using less. Make sure that you are letting the solder flow and not just slub to help avoid unsightly blobs on your rings. The best way to finish the rings is with either a 1/2 round file like a Swiss file in a #2 or 4 fine cut or with a special bit called a Rotary file for your flexshaft designed for cleaning up the inside of ring shanks. Either tool will make quick work of smoothing the inside of wire rings. A bit of fine-grit sandpaper is good for hitting the outside diameter of the rings for a seamless join.

Sharpie marker is a well kept secret tool for coloring in lettering while leaving discs, etc. bright silver. Simply remove excess ink quickly and cleanly with a Q-tip and some 91% isopropyl alchol. You can purchase it at Target and most phamacy-style stores. They give a wipe with a jewelry polishing cloth...done!


Comments for Polishing Stamped Jewelry

Click here to add your own comments

Feb 08, 2012
Im still in need of help
by: Kristi Clark

First, thank you for your time. I really appreciate it. Could I start by saying that the hole punch I use is from the bead smith and even when brand new it still leaves a small lip of rough metal on the underside after I punch through 24 or 22 gauge. When I use a flat or even rounded file to smooth that it ends up scratching my disks on the back....I know it's possible to do cause I've seen other peoples work and theirs isn't scratched or messed up on the back.
As for the sharpie, I knew I could do that but the sharpie isn't permanent. And I hear it can wear off with time. I want to get the firescale off...the pickling doesn't seem to do it completely. The solder on the inside is fine...I am just looking for the easiest way to polish the silver. Like I said before, the HF tumbler didn't polish my jewelry even after 24 hours. And I see people say they put their silver in for hours and it comes out clean and polished...I'm not sure what I'm doing wrong.

Feb 08, 2012
Further clarification
by: Stacy

Hi Kristi!

I thought you meant that you were punching your own discs.....not about making the tiny holes in them for jumprings, etc. Sorry about that. Beadsmith makes a similar hole punch to the Eurotool punch I use and sell. I've never tried the Beadsmith version, but I imagine they work about the same. The "dull pin" point I made before still applies. When my punch-pins are sharp, they create a nice, clean hole. When the pins get dull, the holes get sloppy and it's a struggle to pull the metal item off the pin. You can use a high quality flush cutter to first trim the excess metal from the hole, then file. Fine grit sandpaper is all that is needed then. Less scratching.

You can drill holes by using whatever size drill bit to match your desired hole size and use either a drill press or your flexshaft. You get clean holes with both tools. I've used Sharpies for years and have not had a problem with the ink staying put, even after lots of wear. Silver Black flakes and chips off as it's more like a paint vs. a patina.

If the torch residue or "firescale" isn't coming off, you may not be leaving the pieces in the pickle long enough. Make sure you're using a hot solution too as it works much faster. Pickles can loose their effectness over time, so perhaps a fresh solution is needed also? You can protect the silver from firescale (true firescale is actual damage to the metal which DOES NOT come off! It looks like bruising or shadowning on the silver) simply dip or brush your silver with a mixture of 50/50 denatured alchol and boric acid. This dries and forms a whitish powder coating on the metal. You must still use flux at the join. Pickle removes the residue.

Kristi, there really are no fast and simple solutions to finishing work and jewelry fabrication. Some things just take time to be done properly. I've found that often, the finishing work takes longer than the fabrication did. It can be a chore, but done well and done right, the finished results are well worth the time. I can't comment about your tumbler as there are just too many factors that influence the results. I have both HF and Lortone tumblers and I've been happy with the results from both. It the hand work is not giving you the results you are looking for, you may wish to consider investing in a small bench-top buffing machine or regular polishing machine. With the right combination of buffing wheels, polishing agents, etc. you can get amazing shiny, beautiful results.....quickly!

Feb 26, 2012
Rough Disc Hole
by: Deb Mae

One thing that I always do when punching holes for my disc is I use a Cut lube on the punch to extend the life of the punch and it seems to help ease the cut into the metal. Another thing I often have done is give it one whack on the rough side of the disc as this will correct any push out from you punch, then I polish is quick with my dremel with a silcone square edge polish wheel.
I find that the individual hand punches work best meaning clean cut when using 24 guage and up. 22 guage is pretty hard on these tools when I need to cut into thicker than 24 I use a drill. I also ofen quickly use a 1/2 round file to clean up the inside of the hole.

This sounds like a lot of work by seriously it only takes moments and i think that if you get a good punch you will find that your problem will be mostly solved.

Jun 14, 2014
helpful tip?
by: Terra

Hi ladies,
I have been researching an easier way to finish my stamped jewelry. I am 40 yet already have arthritis in my hands and shoulders (thanks mom). This makes hole stamping and polishing 50+ blanks per day very difficult.

I saw that you are using a hand punch to make your holes. It was AWFUL for me. I visited a site called stampingblanks.com. He sells the power punch. Now, you need to have it mounted. It doesn't work as a hand-held punch....but it has made my life HAPPY! It takes a little getting used to but honestly, if you are as busy as I am over the holidays, mothers day and fathers day it is WELL worth the investment!

I do use the sharpie method and LOVE it. I have only ever used the industrial Sharpie...after two years, my own personal pieces are black as ever. :) But I have to thank you for the alcohol tip. I have been using nail polish remover but of course that's pretty harsh. Can't wait to try your method!

Now for my question: Can I tumble pieces after the stamping has been blackened? To give it the finishing polish right before I assemble it? Or will it remove the black? I need to figure something out...or take a massive break from working. My hands just can't take much more!


Jun 25, 2014
Tumbling Blackened Lettering
by: Stacy Perry

Hi Tarra!

I use a Power Punch from Eurotool and we use them in my classes too. I agree, they are cumbersome and awkward to use and potentially dangerous if not used properly. I was in a workshop by Jack Berry and he held the Power Punch in a vice.....worked like a charm especially when punching larger holes in thicker gauges of metal. Seeing that punch in a vice was very much a "duh!" moment for me!

As long as the Sharpie-darkened areas are recessed, they should tumble just fine. However, if some of the black does come off, simply reapply and remove the excess with 91% Isopropyl alcohol and a soft cloth or dry-ish Q-tip. Reapplying and removing the marker should not affect the high-polish finish of the metal.

Jun 23, 2015
How to get that "fire scale " look off...
by: Shannon

Hi! I made a lot of Sterling silver bracelets and oxidized them using the egg trick. To even that colouring out id have to use a piece of steel wool (from walmart $1.99). I'd have to go over each piece for a few mins until I got the finished color I liked. When that was complete, I then tumbled in my 3lb Lortone tumbler with stainless steel shot and filled 3/4 full with water and 1 tsp DAWN LIQUID DISH SOAP. Tumbled each bracelet separately for 3 hours and they came out perfect each time!!!! Good luck!!!!

Aug 14, 2015
Egg Trick?
by: Kristy

I'm very curious as to what the egg trick is. I'm working on finishing my own blanks and am not having a lot of luck with getting the shine I want. Hence reading the questions on this lovely and informative site. Thanks for all that you do!

Aug 14, 2015
The "Egg Trick"
by: Stacy

Hi Kristy!

The "egg trick" refers to putting your silver or copper jewelry items in a zip-top style plastic baggie along with smashed up hard boiled eggs to sit for a while to oxidize the metal.

The smell, mess and splotchy, inconsistent results make the use of hard boiled eggs an unpopular choice for oxidizing metal. While eggs and liver-of-sulfur may smell similar, they do not produce the same patinas. At least, I personally did not have much success with the technique.

Aug 14, 2015
Egg Trick...
by: Shannon

To add that nice darkened patina to sterling silver you can use this egg trick! Completely non toxic! I hated the idea of using chemicals when I started making jewelry and found this method to work 100%! Simply get yourself two eggs, a glass jar with a twist on lid, a piece of string or twine. Now go boil your two eggs for approx 25mins in water. When boiled, peel off shells and slice each egg in half and drop into glass jar with yolk up. Then place your silver piece hung from the twine and dangle over the eggs. Close the lid over it all and the twine will act as a shelf for the items you're patina'king. Wait about 4-6 hours before opening jar. You get to know how dark you want your pieces. When finished, THROW OUT THE EGGS! Now it's time to clean up the silver: rinse under warm water with dawn liquid soap to remove any egg residue. Then dry with a soft cloth or paper towel. Next, I like to use a steel wool pad (find at Walmart in the kitchen section) - the finer one. Now take your time and rub every square inch of your piece - you will start to see all the lovely patina definition.! When that's done, pop the piece into the tumbler for 2-4 hours to polish it up. Ya da! You have a perfectly antiqued silver piece of silver!

Aug 17, 2015
Egg Patina
by: Stacy

Thanks for those tips Shannon! I haven't had the best results using eggs to "antique" copper or silver, so I use chemical patinas. But I'll give your method below a try! At least the process is fairly quick and the eggs won't be too bad. (better than liver-of-sulfur!)

If the results are good, I'll pass your tip on with my students.

Thanks for sharing!

Aug 17, 2015
Ps...
by: Anonymous

The eggs must be HOT when you put them in the jar. Work quickly to get the kid back on and trap the gases.:) good luck! I worked with sterling silver only with eggs. Never tried with any other metals.

Click here to add your own comments

Return to Tumble Polishing Q & A.