▪ Hoop Earring Tutorial ▪
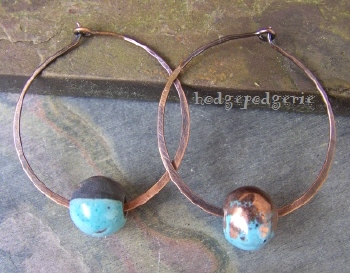
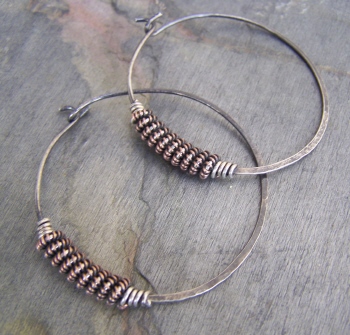
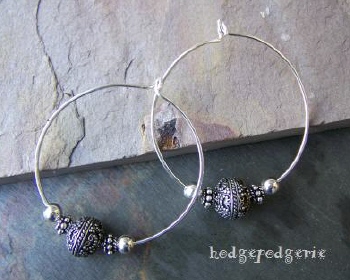
Classic hoop earrings are a first choice accessory for many people for everyday wear. Here's an easy tutorial that will have you quickly creating the basic hoop design. You can dress up the earrings to suit your personal preference by texturizing the metal, sliding on beads, or adding a patina or other finish. Use longer or shorter lengths of wire and different mandrel sizes to change the loop size. Have fun discovering all the variations of earrings you can create with this classic design!
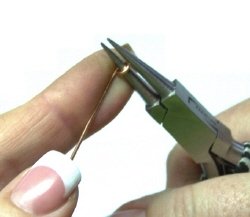
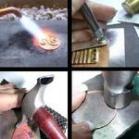
Cut two pieces of 18 gauge wire 6-1/2 inches in length. Flush cut one end of each wire. Using your round nose pliers, make an eye pin on the flush-cut ends. The eye pin should not be too big, but large enough for the wire 'post' to pass through. This is important for keeping the earrings from sliding out of your ears.
Shape the wire by holding BOTH wires together and looping them around a mandrel - in this case a PVC pipe - until the entire length is pressed to the mandrel, with the ends passing the eyepins.
Carefully slide the hoops from the mandrel. Hold the earrings together and trim the ends approx. 1/2 inch past the eyepins.
NOTE: You can make earrings either round or oval by using different shaped mandrels.
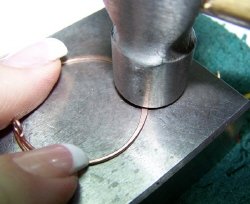
Place each hoop on a steel bench block and, using your ball peen hammer, gently tap the wire entire length while holding it in the shape you want. This hardens the wire, preserving the shape.
Flatten the bottom two-thirds of the hoops with your ball peen hammer on your bench block.
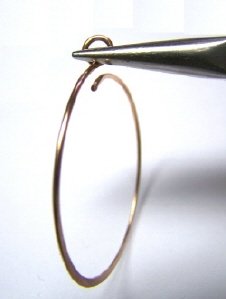
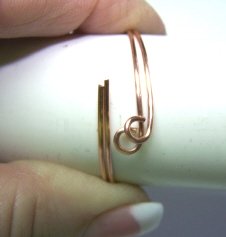
Grip the eyepin loop with your chain nose pliers and bend it straight up almost perpendicular to the hoop.
Grasp the non-loop end of the wire and gently bend it up with your round nose pliers, creating a slight curve which will hook into the eyepin loop.
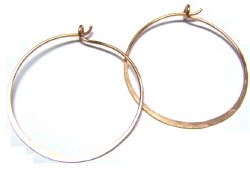
And there you are! You can now tumble, polish or patina your new hoop earrings! Note: I would high recommend perfecting your technique on copper before trying it on more costly metals like Sterling silver.