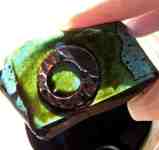
▪ Etching Copper ▪
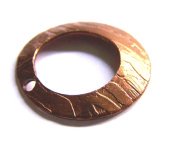
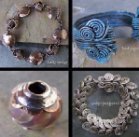
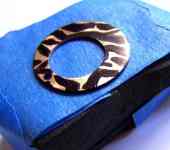
Expand your jewelry design possibilities. By etching copper you can add cool textures and patterns that really help your metal jewelry stand out.
I teach classes and workshops where copper etching techniques are emphasized. There are other methods of etching copper, but the technique described here has been proven in my classes to give consistently successful results. It also doesn't use harsh chemicals, just ferric chloride, which is very easy to come by.
Safety First!
Please remember that you'll be handling a potentially hazardous substance. A little common sense is in order. YouÕll be using ferric chloride as a mordant to etch the copper. While it does not hurt when it comes into contact with your skin - some say it prickles slightly - ferric chloride does stain everything a dark brown or orange. So, I recommend wearing double gloves when handling this substance and protective clothing such as a full apron made from either cloth or plastic.
Ammonia mixed with water (A 50/50 solution) acts as a neutralizer for the etchant. RINSING WITH WATER WILL NOT STOP THE ETCHING ACTION!!! You must immerse the items in the ammonia/water neutralizer for 15 minutes to stop the etching action. After etching, it is necessary to remove the ferric chloride residue before it dries onto your piece. If it dries on, it does not come off!
Proper ventilation is mandatory if you are heating this solution! While the ferric chloride works faster when heated slightly, the fumes can be harmful. Therefore, I recommend using the solution cold.
SPENT OR USED FERRIC CHLORIDE MAY NEED TO BE TREATED AS A HAZARDOUS WASTE! Ferric or iron chloride is a salt. It is much safer to use than many of the alternative harsher chemicals. In most places it can be safely flushed down the drain once it's neutralized. However, check with your local government authority for your proper disposal requirements. DO NOT put non-neutralized Ferric Chloride down the drain as the residual copper may damage your copper pipes! Copper will be deposited as a sludge. Allow the sludge to settle, pour off the liquid, further dilute it with water and then flush it. Collect the sludge in plastic bags and dispose of it as required by your local governmental authority.
Now, with all that being said, remember this. This etchant, while it can stain your clothes, the counter, sink, etc...with proper use, it really can't hurt more than that. Go slowly and think before you act and everything will go smoothly. After etching, the ferric cloride can be poured back into its original container to use another time. When it starts taking an hour or more to etch, it's time to replace the solution.
Preparing To Etch
1. Your metal should be grease-free with no scratches. Scrubbing with 0000 fine steel wool or 600 Wet/Dry sand paper creates an ideal finish for etching. Scratches allow the etchant to get underneath the design and lift it, thus ruining the pattern youve created.
2. Put on some disposable gloves to protect your hands from the ink! This step is not necessary, but youll be glad you did!
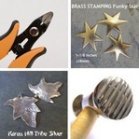
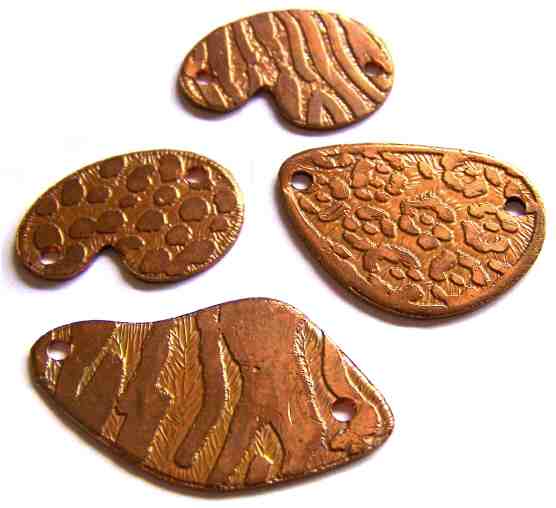
3. Draw or stamp your designs onto the copper. A Sharpie® indelible marker works great. Plain ol rubbing alcohol will remove any boo-boos you make. Draw flowers, animal skin prints, aboriginal designs, anything you wish to stand out! Remember, the etchant will remove the metal wherever your ink is not!
4. Blue painters tape will also resist etchant and can be used as a resist in place of the permanent marker. Tape is good for sharp-edge geometric shapes. Stick tape to a piece of glass and cut out shapes with an Exacto® knife. Gently lift the tape off the glass with tweezers and press down onto the metal. Be sure your tape is totally smooth or the etchant will get underneath it, ruining your design.
The Etch!
NOTE: Before etching, have a 50/50 ammonia/water bath ready. This is what youll use to immerse your pieces in after the etching process is complete, to neutralize them.
1. I've found that the dense foam play things for kids like the buckets of colorful balls from Jo-Ann and Michaels work great! They are dense enough that the mordant does not penetrate them, so you can use them over and over. Cut them into workable sizes. I prefer the foam squares or other shapes with flat surfaces, so that I don't have to cut them in half. If using the balls, simply cut them in half to create little "boats."


2. Apply the blue painters tape or double sided sticky tape to one flat surface of the foam. Make sure it is anchored well so it does not come off during the etching process.
3. Apply your pieces with the design edge facing you. Adhere them snugly to the tape surface.
4. "Float" the boats on the etchant with the design facing down into the ferric chloride liquid. This allows the particles of copper to fall away from your design during the etching process so they dont corrupt your design. Ferric chloride etches in a straight line, so you get a nice edge on your designs.
5. This etching process takes an average of 30 minutes. You can check the progress by simply lifting the "boat" out of the etchant and looking at the design. When you're satisfied that you have a nice clean and deep edge, youre done etching and it's off to the neutralizer bath!