Chasing hammer size and weight
by Judith
(New York)
Hello Stacy,
You helped me awhile back with info on a bench block and I'm back needing input on a chasing hammer. My choices are:
15/16" x 2 1/2" - 3 oz. head; 1 1/8" x 2 3/8" - 4 oz. head;
or 1 1/4" x 2 13/16" - 6 oz. head. All have slightly convex, smooth faces, are forge tempered, polished steel, the other end round for peening. Which size would you recommend? Thanks so much for taking the time to answer not only my question but all the others! The info you give is thorough and so helpful. I know I'm not the only one who appreciates you taking your time to do this!
Judith
Stacy's Answer:
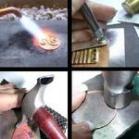
Hi Judith! Get yourself comfortable as this is a long one!I have tried many hammers and let students experiment with them in the classes too. When needing to move a lot of metal like when making synclastic forms, etc., I use a large, rounded face chasing hammer because the bigger the face, the more metal I can move using the same amount of exertion. But, when hammering needs more control, or I'm working close to my fingers,:) I've found smaller faced flat hammers to be best. Most folks I have handed a flat-faced chasing hammer to badly mar up the metal with the outside edge of the hammer being the culprit. It is difficult for most people to hold and keep that hammer face level to the striking surface and chasing hammers are just too darn big! Even the smallest ones still have at least an one inch face.
I sand my ball pein hammers so that the edge is slightly rounded, thus helping to avoid any hammer marks. The ball pein hammers available in my Etsy store are nicely balanced but they should be sanded. You start with a 500/600 grit and then use a 100-1200 grit. Put the sandpaper on a table, and vigorously rub the hammer face and sides and then the ball end too back and forth. Check your progress until you have a smooth, shiny surface. This takes about 15 minutes and is well worth the effort! It's funny that you are asking about how to blend in the hammered part with the unhammered round wire, because we just went over that in my classes last week! Here's how:
Take a piece of flush-cut wire, say 14 gauge (it's just for practice!) and lay it on your bench block. Try concentrating on flattening on the end 1/4 inch or so. You can do this by trying to only flatten the very end of the flush-cut wire. Hit the end with a pretty good wallop and then as you move away from the end and the really flattened area, ease up on how hard you hit the wire and gently tap it beyond the area you've flattened to blend the hammered area.
You can do this on a wiredoodle also. Take a piece of 14 or 12ga wire and make some loopy turns like an 'S' (not overlapping) in it. Again, lay it on your bench block. Hammer the curves only and brush the wire with your hammer in the direction you wish it to flow. I think of curves like calligraphy letters and strike/brush the curves in the direction I wish to widen them and not mash flat the entire piece! Use more force on the area you really want the widest and again, make your hammer strikes softer the further away from the widest area you go to blend in the widened area. It's a TAP, TAP ,tap. You can see evidence of this on the wiredoodle-style freeform bracelets here on my website and also on my Etsy jewelry site on the freeform scarf-pins. This works really well for blending in those flat hammered sections with the round wire sections.
Often, I see round wire then a 'cliff drop' to the flattened area when I look at people's hammering. The above technique will help you to avoid that. But, like with anything else, practice makes perfect. So use some scrap wire and get busy! You can use a piece of 18 ga and first tap the length of wire, say it's 6 inches, then start at the end and hit hard brushing to the right, then move down and hit hard, brushing to the left, etc. the entire length of your wire. When done properly, you should have a piece of wire that curves one way then the other like little scallops. This will help you to learn hammer control. Also remember that hammering like this is a wrist action and not a stiff arm/elbow thing. THAT will hurt your joints!! Keep relaxed and a firm but relaxed grip on that hammer!
Hope my hammering technique description makes sense. It's one of those things that is so easy to demo, but difficult to put into words.
Comments for Chasing hammer size and weight
|
||
|
||