▪ The Ball Pein Hammer ▪
This question about use of the ball pein hammer sent to me by Emily Mancini prompted the article below. Thanks, Emily, for your thought-provoking question!
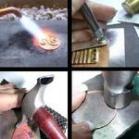
Hello! I have a question about hammering metal. I have a jewelry business specializing in hand stamping. I hammer most of my metal (copper, brass and silver). I have tried about 5 different ball pein hammers for different textures. I usually work with a 16 oz.
I would like to know what the difference is between the many ball peins out in the market. I see some that are as much as $75 and as cheap as $6. Does the shiny mirror like finish on the ball have to do with the the final finish of the metal? I like the matte finish for some pieces but would like some hammered pieces to have a high shine.
Does the texture and shine of the ball have to do with the final hammering sheen? And the weight, does that have to do with how deep the dents go?? Thanks for any advice you can share as I learn more about the world of ball pein hammers :)
There is a world of difference in ball pein hammers! Because I teach in many places and have met lots of people, I have had an opportunity to try a wide variety of hammers! There are some very important considerations when choosing a hammer. Personal preference is an important factor, but also the styles and qualities of the hammers factor into what makes one hammer more desirable than another. I'll share with you my preferences in ball pein hammers.
Size
Yes, size does matter! Too large of a hammer and they're unwieldy and difficult to use. For hammering discs and wire on a small steel bench block, I've found that a smaller head allows you more control in just exactly where you place that hammer face. That control is why I prefer a ball pein style hammer as opposed to a chasing or planishing hammer. Nice hammers, but not for working close to your fingers. In class, I refer to them as 'finger mashers.' More about these hammers later!
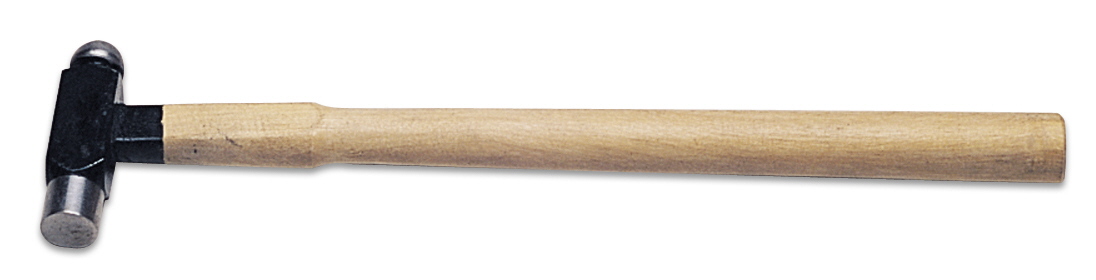
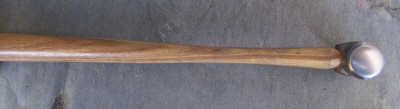
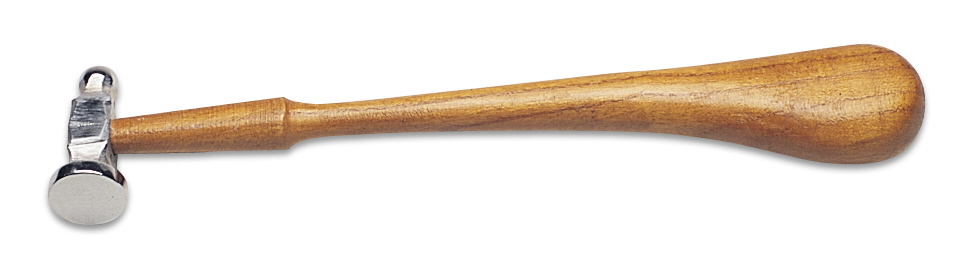
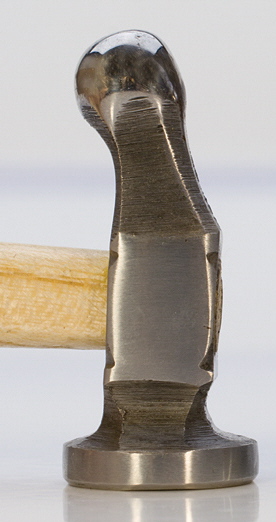
While the ball pein hammer comes in an assortment of head sizes, I use a 2-1/2 inch head with a 3/4 inch flat face and a smooth nicely rounded ball. It's a 4 ounce size (head only) and has a nice long solid hickory handle that is tapered at the neck to allow the hammer to have a whipping action. The flexibility of the handle allows the hammer to do most of the work for you and is very comfortable in the hand. I've included a photo of the hammer. They typically sell in the $12-25 range.
Most home supply stores carry the larger sizes of this hammer, but you don't need a super big hammer to get the job done. Remember, you're not building a house, you're creating jewelry! 8 and 12 ounce and larger head sizes hammers are not only more difficult to use, they also get very heavy when wielding one for long periods of time. I have a one pound dead-blow hammer and it is heavy! I can't imagine wielding one of those mongo hammers for delicate or lengthy hammering work! Also, I want to determine where I land my hammer face and where the metal is being flattened or where a texture is being added. The more control you have, the better results you'll get!
The opposite is true for ball pein hammers that are very lightweight.
If they're not beefy enough, you are forced to make up the difference by raising the hammer higher in order to apply more force, thus reducing accuracy and risking bruised fingers and flattened areas where you didn't want them!
Face Shape
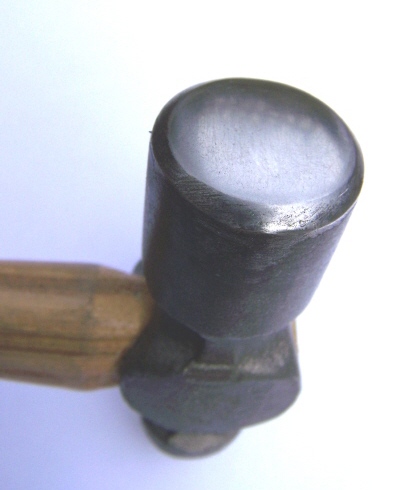
I prefer a flat face instead of a slightly domed face. The actual striking area of a domed face is smack-dab in the center of the face. That domed face is great for moving metal in some applications, but for texturing and flattening wire, you have to get too close to your fingers to actually make contact with the metal and the area you're trying to work on is hidden by the face of the hammer. How can you see what you're doing if your hammer face is in the way?
A smaller, flat face allows you to work with more accuracy in tight places. I call this 'hammer control.' It also allows you to keep your fingers safe!
Handle
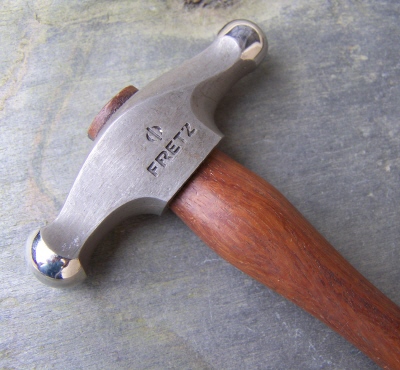
I like natural wood handles. The first thing I do with any of my hammers is, if it has a lacquer coating I sand it off with very fine sand paper. This gives the hammer handle a super smooth feel in the hand which I find very comfortable. Coating on wood can feel 'sticky'. Fretz makes beautifully crafted hammers with extremely comfortable handles made of rosewood and other hardwoods. No varnish or lacquer on them! The heads are all polished to a mirror shine. Yes, I do have several of their hammers and I love them, but they are pricey! The Fretz mini hammers average in the $55 range and their larger hammers $80 - $125 each.
Here's my favorite ball pein hammer. Note the nice slim neck on the hickory handle. It's available for purchase in my Etsy store or contact me through the website.
Polish
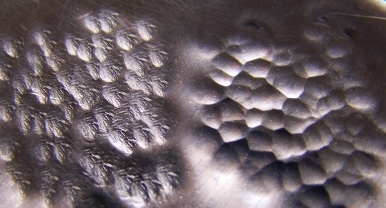
Many steel hammer heads are coarsely finished. To solve this, I sand the face and the rounded ball of the hammer using different grits of sand paper. It takes about 15 minutes to get a high-polish finish on the face. Any texture you have on the striking surface will transfer itself to the soft metals you're working on. You can really see the difference when dimpling metal. You can see in the photo below how the dimpling pattern looks when made with a highly polished strike surface vs. a strike surface that is slightly rough.
You may want a rougher hammer face to create a linen or silk look, but for a high-polish blemish-free surface, your hammer strike area must be clean. The Fretz line of hammers are a true joy to use and each hammer is precision-crafted and polished to a flawless mirror finish. Sadly, they do not offer a ball pein hammer, but they do offer a couple of hammers you can use instead. But then, you have to buy two hammers to do the job of one. This being said, if they come out with a ball pein hammer, I'll probably be one of the first in line to get one!
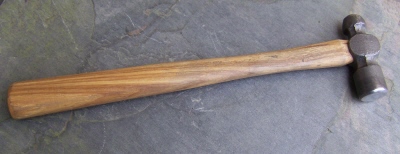
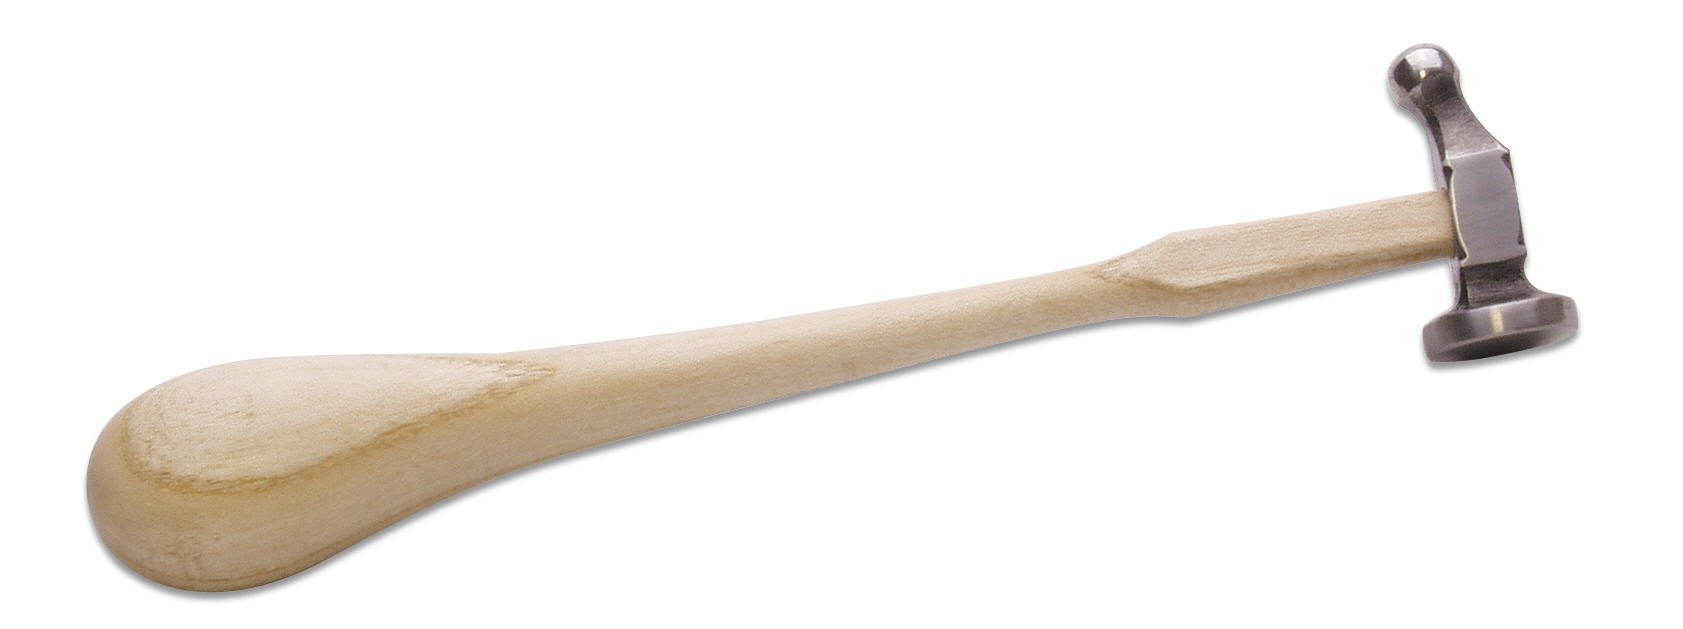
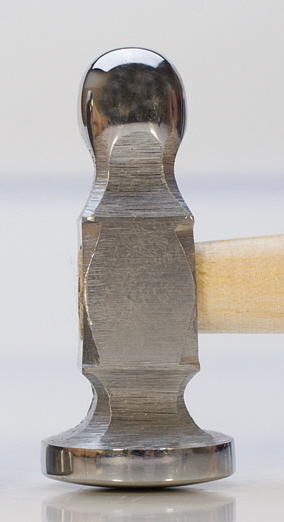
Here is a picture of the ball pein hammer that I prefer after the striking areas have been sanded smooth. I also show to the right of it a closeup of the Fretz dimpling hammer which will create two different dimple sizes.
Quality
You want a hammer that is well made - one that you can trust that the head is not going to fly off or crack in half. I've had both happen. With use, hammer heads can loosen. To tighten them up try the following technique:
Tool Tip: This handy tip was given to me about how to tighten up the head of a hammer if it loosens. It really works!!!! Here's what you do.
- Place the hammer or hammers in a plastic container head-side down.
- Fill the container with just enough anti-freeze to cover the hammer head. You don't want to immerse the whole thing in anti-freeze!
- Cover and leave the hammer to soak overnight.
- Remove your hammer and wipe clean.
The anti-freeze won't cause the steel parts of the hammer to rust, but will swell the wood to tighten the heads up. This method works really well.
Anti-freeze is deadly to animals. It smells and tastes sweet to them and just a spoonful is enough to kill a large beloved pet. Please be careful to put your container where no animals or children can have access to it. The cover is not a necessary part of the process, just an extra safety measure to prevent an animal from getting to the anti-freeze.
Weight and balance are important. Is the wood lightweight? Splintery? I don't know about you, but I wouldn't trust a hammer like that and I don't want to have to worry about splinters!
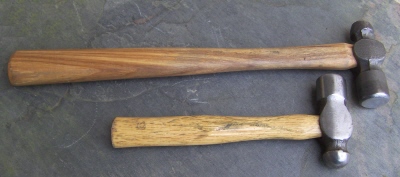
One of the first ball pein hammers I bought was from the craft section of a discount store for $4. It has a 4 ounce size head on it and a hardwood handle of unknown origin, but the handle's short - 6 inches long. I like the fact that it fits into my tool case for convenience, but the short handle hits my hand in the wrong area, which can cause problems over a long time if you use it a lot. Some craft stores carry a similar hammer for around the same price. I've noticed that today they're not made as well as they were years ago...the wood's lighter weight and splinter, and sanding doesn't help! So...if you go that route, be sure to really inspect the wooden handle. In the photo below you can see my original short-handled hammer next to my favorite ball pein.
Grip
Move your hand to the back of the handle and let the hammer do the work for you! For adding a dimple texture, let that hammer bounce lightly in your hand! You want to DIMPLE the metal, not MASH it! Stiff arming your hammer will result in sore elbows and wrists! Use a firm grip when you have some serious shaping or flattening to do. Then strike with a quick hard hit! The more force behind the hit, the larger your dimple is going to be. Experiment with this....you can create very different looking patterns just by using different amounts of force behind the blows.
A Note on Chasing Hammers: Chasing hammers generally have a large face, either domed or flat, with a ball on the opposite side, and long bulbous handles. Because of its design the chasing hammer allows you to ignore the rise and fall of the hammer and concentrate on the effect the strike is having on your project, while usually allowing for long periods of hammering with very little muscle fatigue. The slender neck of the chasing hammer creates a whipping action during hammering which allows for a higher impact and maximum movement of the metal, without having to strong-arm it.
A larger hammer can withstand the force of harder blows. Using a lighter hammer for those great mashing blows may result in the breaking of the thin neck of the handle. Yes, I've seen hammer heads go flying during class (not a safe situation). This is especially true with the lower quality versions of this popular hammer. I think the chasing hammer is best for Repoussé and metal forming applications and not general hammering of wire, etc.
As you can see by the pictures, the actual strike zone is in the center of the hammer face which is some distance from the edge of the large face. This means you not only have to work closer to your fingers when using this style of hammer for general wire work etc. on a small bench block, but you also can't see exactly where you are hitting, making accuracy more difficult. I mentioned this up above.
I've actually had students bring in chasing hammers with a 1-1/2 inch diameter rounded face and try to flatten a little piece of wire on a a 2-1/2 inch square bench block. With a huge hammer face on a small working area, accuracy is difficult (yep...finger mashers).
Final Thoughts:
There are many, many different hammers out there. Here I've only touched on the ball pein and why I think chasing hammers are unsuited for general wirework. The article reflects my opinions and observations from my own experience with these hammers and the situations I come across during my classes and workshops and, of course, listening to the comments of others about their own experiences with these hammers. Your individual preferences may be different. Don't be afraid to try different hammers so you can find what suits you best!
The bottom line is this: The proper use of a quality hammer and using the right hammer for the job will make your hammering experiences not only more enjoyable, but you'll get more consistent and desirable results!!