An "in-gauging" question

by Lori A Croy
(Elkhart, IN)

First off I want to thank you for your site! So much info available for free. Unfortunately, in my journey to learn metal work I have not always found it to be so. Anyhoo, I have been a stained glass artist for over 10 years and it seems that getting into metal working is a natural evolution for me. I see the potential for use both in stained glass and as a new exciting art in its own right. I have experience with soldering, basic patinas, hinge making etc... My current obsession is making a memory box pendant from a piece of copper sheeting to a finished and filled pendant. The problem I am running into is figuring out the proper gauge to use. I do not plan to embellish the box itself, just patina it. So the metal would not be exposed to a great deal of work hardening in the process of making it. I might do some etching on the outside of the box or add accents with some non adhesive copper foil I already have. (Again lots of ideas) I am just not sure what gauge the copper should be and as it can get quite pricey I don't want to buy a roll or plate only to find it isn't right. Any suggestions or help would be much appreciated. I have made a couple of paper models of the box itself and am getting close to having a pattern I am happy with so it's time to solve the gauge dilemma.

Again, thank you for the site and your willingness to help us "newbies" out. Be blessed. Lori

Stacy's Answer:

Hi Lori!

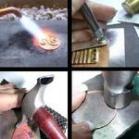
You'll want to use a gauge that will hold it's shape and not warp on you while you're fabricating it. As you may want to etch the surface too, I would suggest using 22 gauge for your box. This gauge should provide the thickness you need without being too heavy for a small pendant. Thinner gauges such as 26 gauge can be used for tube shaped containers.

Copper sheeting is relatively inexpensive and you can buy it at jewelry supply companies such as Rio Grande or often at local hardware stores such as Ace. Ace also sells smaller pieces of sheeting for under $10. (perfect for experimenting!) But as you say, it all adds up and can get pricey!

Just a tip when soldering copper.........copper is a "dirty metal" as it oxidizes very quickly. Because of that, you must bring the copper up to temperature quickly for your solder to flow before too much of a layer of crud forms while applying the torch. You'll get a stronger join that way. If you're making a box, you'll need to back-solder and I've only seen copper solder in Hard. To cover your silver solder joins, you can copper plate the box once you've finished soldering it by adding a piece of steel such as a large washer to your hot pickle solution. This will cause a layer of copper oxides to form on the surface of what ever you put in the pickle, covering the silver solder. Once you remove the steel, the pickle is no longer a plating solution.

Sounds like a fun project! Have fun creating!

Comments for An "in-gauging" question

Click here to add your own comments

Apr 08, 2014
Thank you so much!
by: Anonymous

Thanks, what a wealth of info! Since I have worked with stained glass and my preferred method is copper foil applied to both pieces of glass then soldered together I have some experience with copper, solder, and heat. And yes you can end up with a mess fairly easily! (Can you tell I've had a few battles?). I am disabled so cost is always a factor in any purchases. It would be much easier if I had all the money I need to do everything I want :-). But I know me and I'd just screw it up, God has me where I need to be. If you have any other cost saving suggestions or can point me in a direction to learn on my own I would be so appreciative. Again, thank you so much for the info! May you and yours be blessed. Lori

Oct 01, 2015
Soldering
by: Ronny J.

I've done electrical soldering, a little, with a small soldering iron. Could you tell me the optimum temp, or do you have a chart showing the best temps for soldering various metals? All I know is basically heat it until the solder flows. I know this won't work for most metals, I've had electrical joins that didn't hold. I don't have a torch, yet, just getting into this, need to know what I need to learn.

Oct 02, 2015
Soldering Basics and Metal Temperatures
by: Stacy Perry


Stacy's Answer:

Hi Ronni
There are many fusible metal alloys called solder. Electrical soldering with a soldering iron is not the same type of soldering done with jewelry. A soldering iron uses low-temp solders with flow temperatures between 190 and 800+ degrees F, but usually no higher than 600 degrees F. The solders used for jewelry fabrication require the use of a torch and high heat and are called "hard solders". The minimum melt/flow temperature for a solder to be considered a hard solder is 840 degrees F. "Hard" solders come in different melt/flow temperatures and are called Easy or Soft, Medium and Hard. There is also an Extra Hard and Extra Easy and Extra Extra Easy. Easy silver solder flows at 1325 degrees F and Hard silver solder at 1450 F. The higher the precious metal content of the solder, the harder it is and the higher it's melt/flow temperare is. With the high temp solders, there is an actual melding of molecules between the solder and the metal being joined, creating a very strong bond.

Think of low-temp solders more as hot glue. They join the items but remain separate from them, so the join is weaker. Regardless of whatever method you're using, it is important to use a solder whose melting or liquidous state is below that of whatever you are joining. I don't recommend coming at a circuit board with a torch!

For jewelry, different metals cast certain colors as they get hotter, cluing the person working on them as to when the metal is at the correct annealing, soldering, fusing, reticulation or melting points. Solders are available in different precious metals and different flow/melt temperatures from extra hard - with a melt temp not too far away from the liquidious state of the metal your working on down to soft or easy solders that flow at lower temperatures. This is important if you are fabricating a piece that requires soldering at different times in the fabrication. "Back soldering" allows you to add new pieces to your soldered creation without disturbing the existing solder. If it all flowed at the same temperature, soldering in stages would be quite a challenge.

Below is some basic metal/soldering information for precious and base metals such as copper and brass.I teach these things in my Metalsmithing and jewelry making classes. To learn more, I recommend checking with your local Fine Art Centers and Community Colleges to see what sort of jewelry-making programs they offer.

Silver takes on a nice rosey blush when it comes up to temperature to allow the solder to flow. These are good colors to train your eye to in ALL lighting situations. The below colors are for Sterling silver. However, all metals take on similar colors with similar results. Just the actual temperatures are different.

VISIBLE RED - 900 degrees F
DULL RED - 1200 degrees F
CHERRY RED - 1400 degrees F
BRIGHT SALMON RED - 1600 degrees F
BRIGHT ORANGE - 1600++ degrees F
BRIGHT ORANGE THAT LOOKS WET - This is where metal is starting it’s liquidus stage. The point of fusing OR just a second or so before the metal goes completely liquidus and you have a puddle!

MELTING POINT FINE SILVER - 1763 degrees F
MELTING POINT STERLING SILVER - 1640 degrees F
MELTING POINT COIN SILVER (90/10)- 1615 degrees F
MELTING POINT COPPER - 1981 degrees F
MELTING POINT BRASS - 1700 degrees F
MELTING POINT PURE PLATNIUM - 3224 degrees F
MELTING POINT PURE GOLD 24K - 1945 degrees F
MELTING POINT 14K YELLOW - 1615 degrees F
MELTING POINT 14K WHITE - 1825 degrees F
MELTING POINT 18K YELLOW - 1700 degrees F

Quenching the metal is an important part of annealing it and also making it so we can handle it! However you must wait until the metal (silver and brass) turns back to the black stage - no longer visibly red - before quenching. This is especially true for Argentium silver as not waiting to quench results in brittle metal which will fall apart and easily stress fracture as you work it.
1200 degrees F is the recommended temperature for annealing silver. Paste flux applied to the silver will turn a brown, clearish and glassy like at about 1100 degrees which is a good visual indicator that the silver is annealed.

EXTRA HARD SILVER SOLDER 80- LazerWire (80% fine silver content) Melt temperature: 1,370°F - Flow temperature: 1,490°F
HARD SILVER SOLDER 75: Melt temperature: 1,365°F - Flow temperature: 1,450°F
MEDIUM SILVER SOLDER 70: Melt temperature: 1,275°F - Flow temperature: 1,360°F
EASY SILVER SOLDER 65 Melt temperature: 1,240°F - Flow temperature: 1,325°F
EXTRA EASY SILVER SOLDER 56: Melt temperature: 1,145ºF - Flow temperature: 1,207ºF
EXTRA, EXTRA EASY SILVER SOLDER 45: 1125° / 1145° F - has a gold tinge and is used with gold filled ***Often contains Cadmium, a known carcinogen
COPPER HARD SOLDER: (92.75% Copper, 7.25% Phosphorus): 1310°F - Melt temperature

Oct 02, 2015
Great!!
by: Ronny J.

Thanks loads! I really, really, need to get that torch!

Click here to add your own comments

Join in and write your own page! It's easy to do. How? Simply click here to return to Jewelry Q & A.