Here are some tips to keep your copper and silver jewelry from tarnishing. Copper and silver are especially susceptible to oxidation, turning your copper brown like an old penny and your silver black. To help retard this process, when you're not wearing your jewelry keep it in a sealed plastic bag such as those made by Ziploc®.
Also, try keeping all your copper and silver wire stock in large zip top freezer bags, which helps keep it tarnish-free and ready to use. Mine are stored in a cloth-lined basket and arranged like file folders and in order of wire gauge, largest to smallest. This really helps to keep the metal clean and tarnish-free...a real time saver as you won't have to clean the wire before using it.
One of the most common misuses of tools that I see in my classes is hammer handling. I repeatedly see students holding their hammers close to the tool's steel head. When a hammer is used this way it puts a lot of undue stress on the user's wrist and elbow. Hammers have a long handle for a reason. Back off and grip as far out on your handle as you comfortably can. (I think some of my students hear me say this even in their dreams, I repeat it so often). By gripping the hammer farther out towards the handle end, you let the momentum of the hammer do much of the work. And do not extend your index finger down the handle as this can cause injuries such as carpal tunnel syndrome.
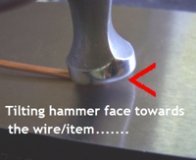
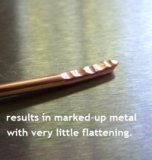
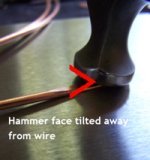
When flattening the end of a wire folks have a tendency to tilt the flat hammer face into the wire. This results in most of the force going into the hammer's edge, leaving marks on the wire and very little flattening. By tilting the hammer face
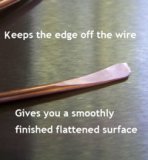
slightly away from the body of the wire the force of the blow is on the outside edge of the hammer face and the end of the wire. Finish the blow with a sliding motion toward the wire end. This leaves the end of the wire smooth, flat and free of hammer marks as shown below.
My hammer of choice For wireworking is the ball pein. If you haven't done so already, check out my article on the
ball pein hammer to find out the reasons why I prefer it over the chasing hammer for wirework. Save your chasing hammer for stamping, repoussé and...chasing.


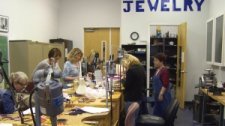 For the winter, I'll be introducing some brand new workshops and a new Metalworks class at the fully-equipped jewelry studio at Morean Arts Center in St. Petersburg. We'll cover the basics of jewelry fabrication and metalsmithing using such techniques as soldering, piercing, stone setting, riveting, forging, heat texturing, patinas, finishing and much more!
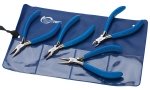 The holidays are fast approaching and now is the time to stock up on supplies and tools. Visit my Etsy stores